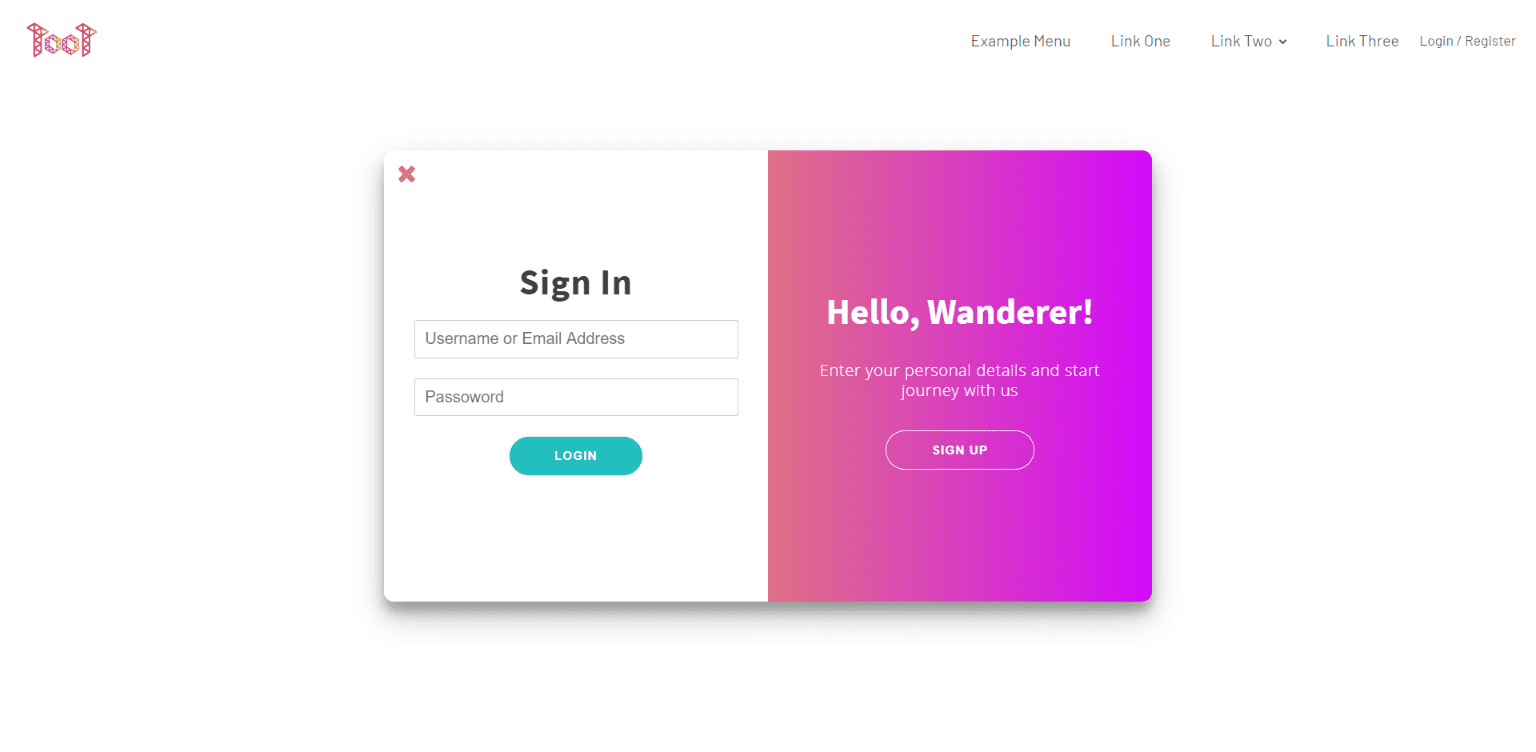
Hello everyone this is Khan Azimi From Tootweb. In today's post, I will show you how you can make a creative sliding login/register popup form on your WordPress websites with the Oxygen Builder.
Preview:
Here is the Login/Register Form video.
Before starting this tutorial I want to mention that we will be using WPForms and the WPForms User Registration plugins, for our Login / Register forms, You can use any plugin for making the form that supports PHP short-codes.
Lets start the tutorial.
First of all, let's create our login and register forms with the WPForms Plugin. Go to your Dashboard > Wpforms > Tools > Import > WPForms Import > Choose a file and upload this file to your website then click on the Import button.
Now open the page on which you want to add the Login / Register Popup Form.
Add an element to your header or any other part of your page which will open the popup. You can design it the way you want.
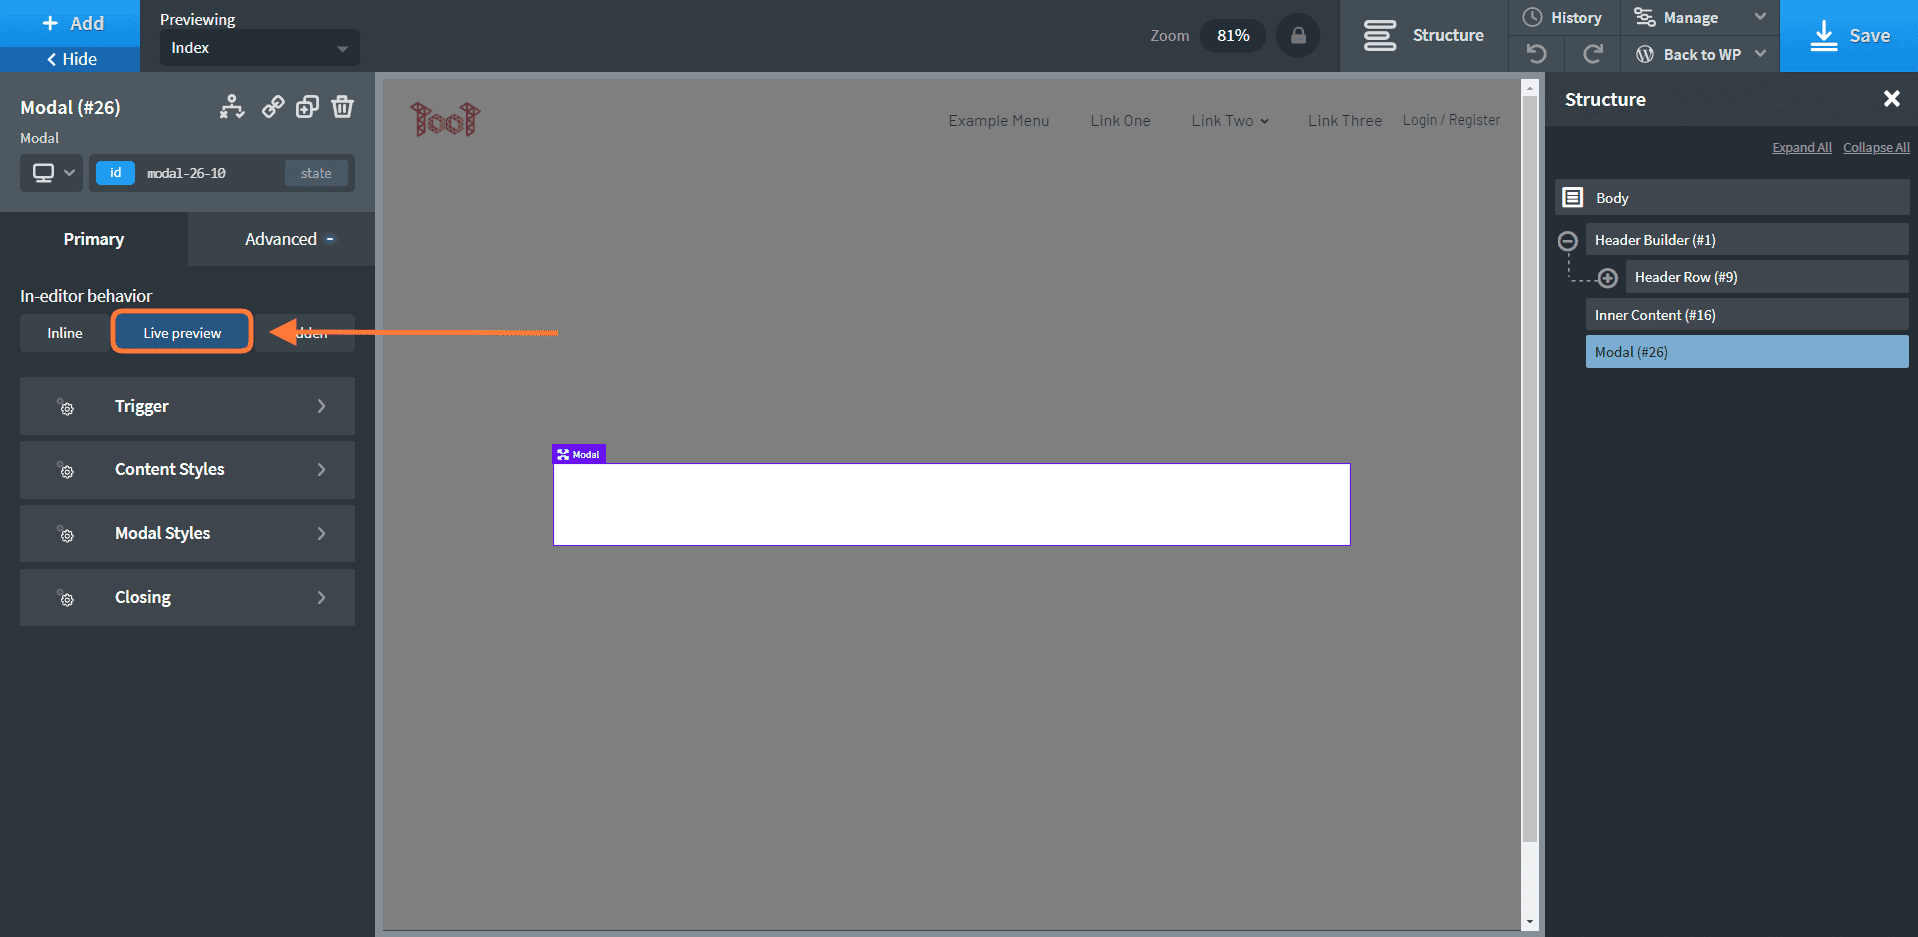
Add a modal element to your page and give it the design below: From the Primary tab choose Live preview as In-editor behavior.
Now go to the Trigger tab and choose User clicks element as the option of Show when. Then choose your Trigger selector as the heading element which we added before.
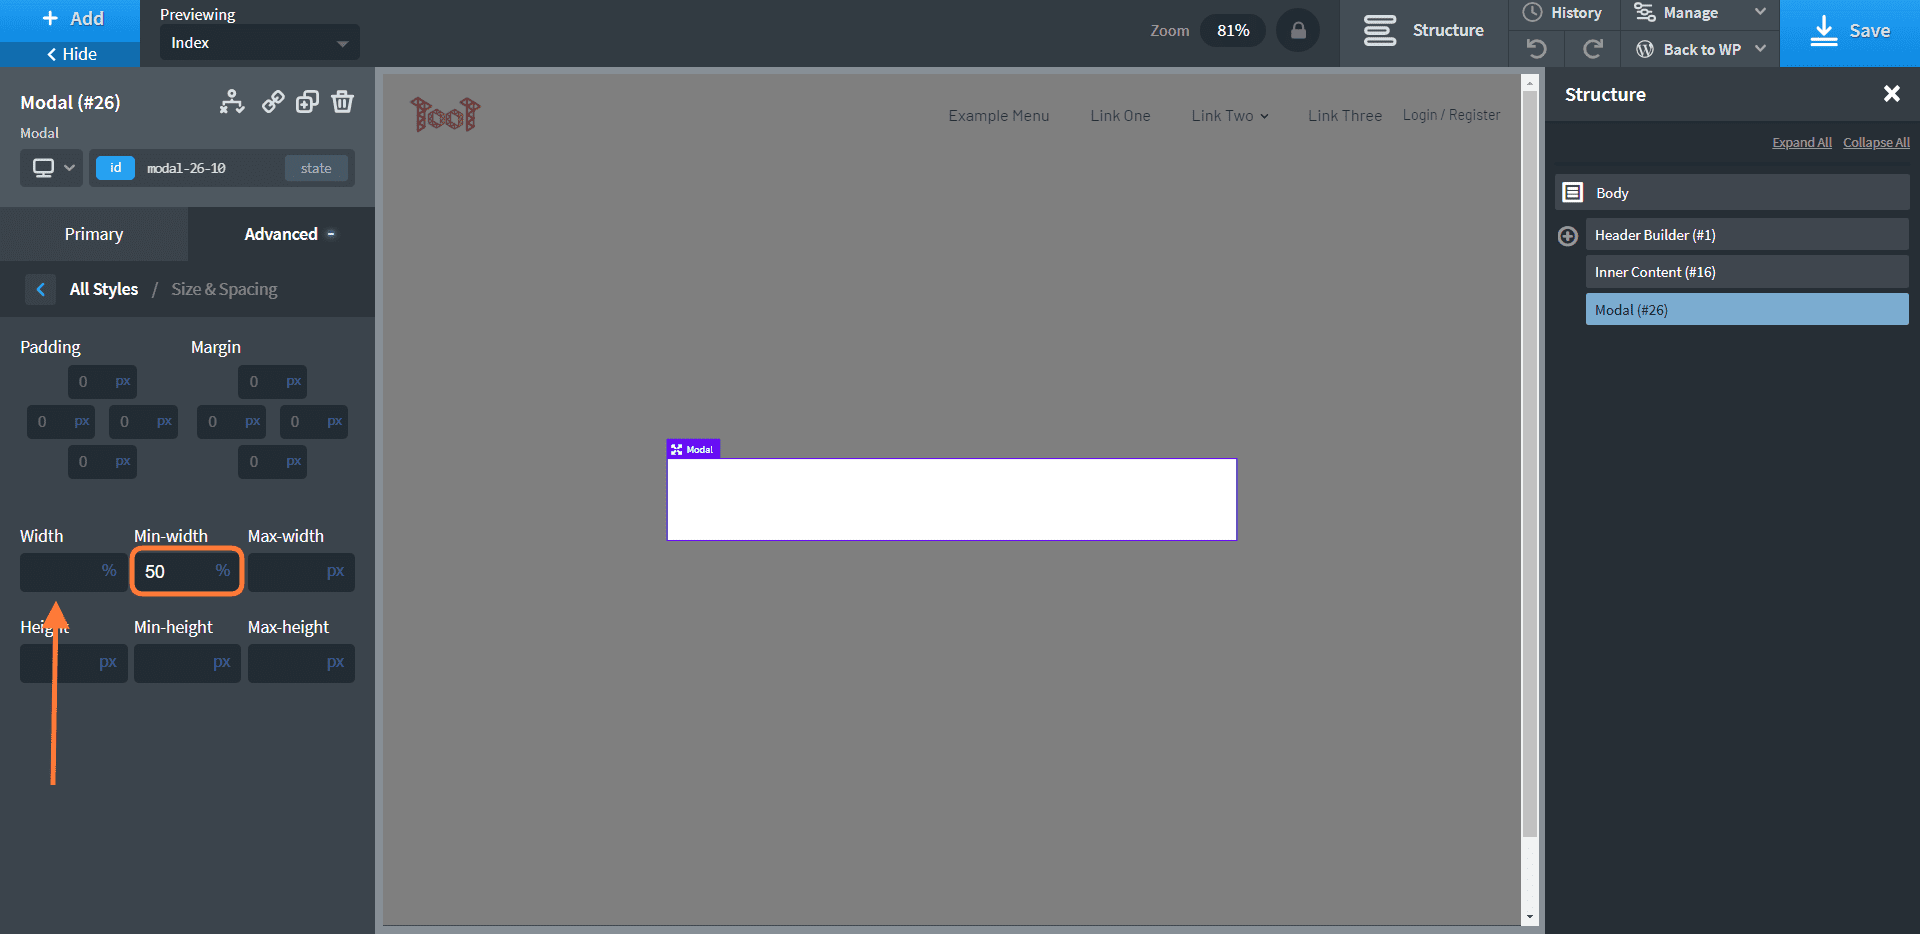
Now we need to go to the Advanced tab > Size & Spacing > And use 50% for the Min-width then remove the 70% from the Width.
Now change the width for devices that are Less than 992px and use 80% for the Min-width.
From the Advanced tab go to Borders and add a Border Radius of 6px to all sides.
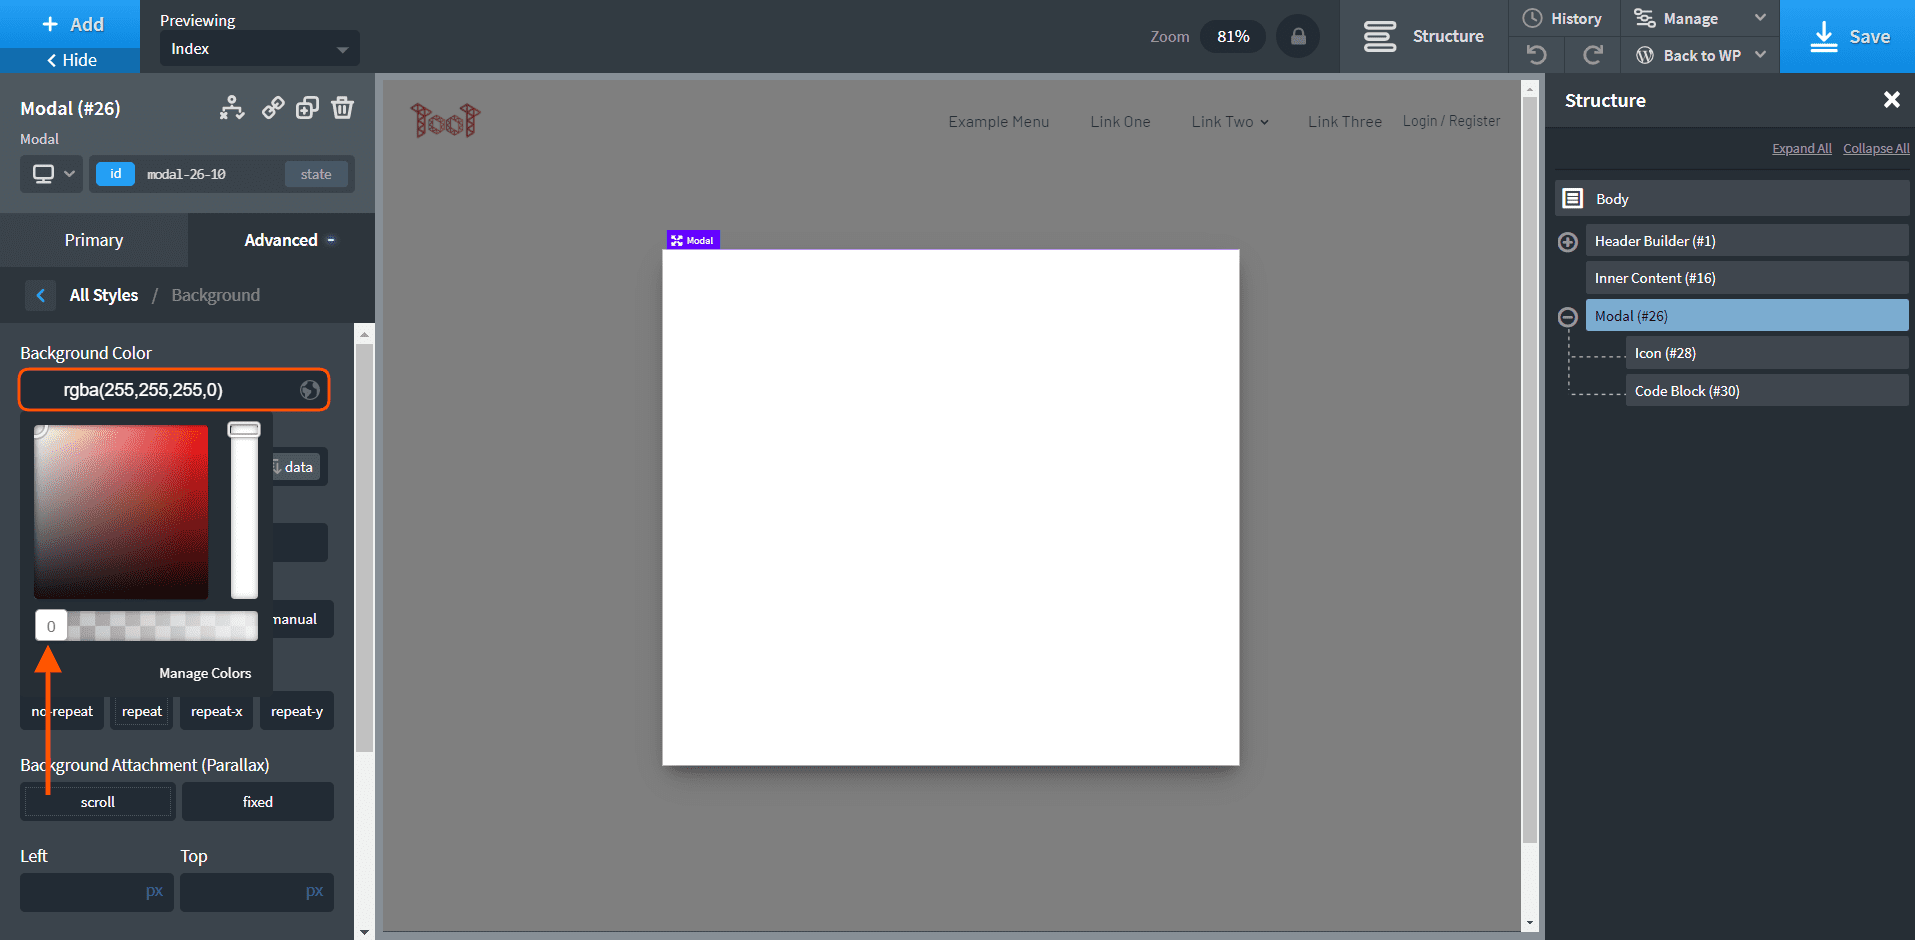
Now go back to the Advanced > Background > And change the color to transparent.
Now go back to the Advanced > Layout > And choose Relative from the Position section.
The next step is to click on the Add button and add an Icon to your Modal.
Change the color to #df7580 then change the font size to 25px and choose the close icon from the Icon section.
Now go back to the Advanced > Layout > And choose Absolute from the Position section for the icon and change the top and left to 10px.
The next step is to go back to Advanced > Layout And change the Z-index to 199.
Now the only thing left with the Icon is to add a Class so when it's clicked it will close the modal. You can add the class by clicking on the id button at the top then typing the class to the class field, The class should be "oxy-close-modal".
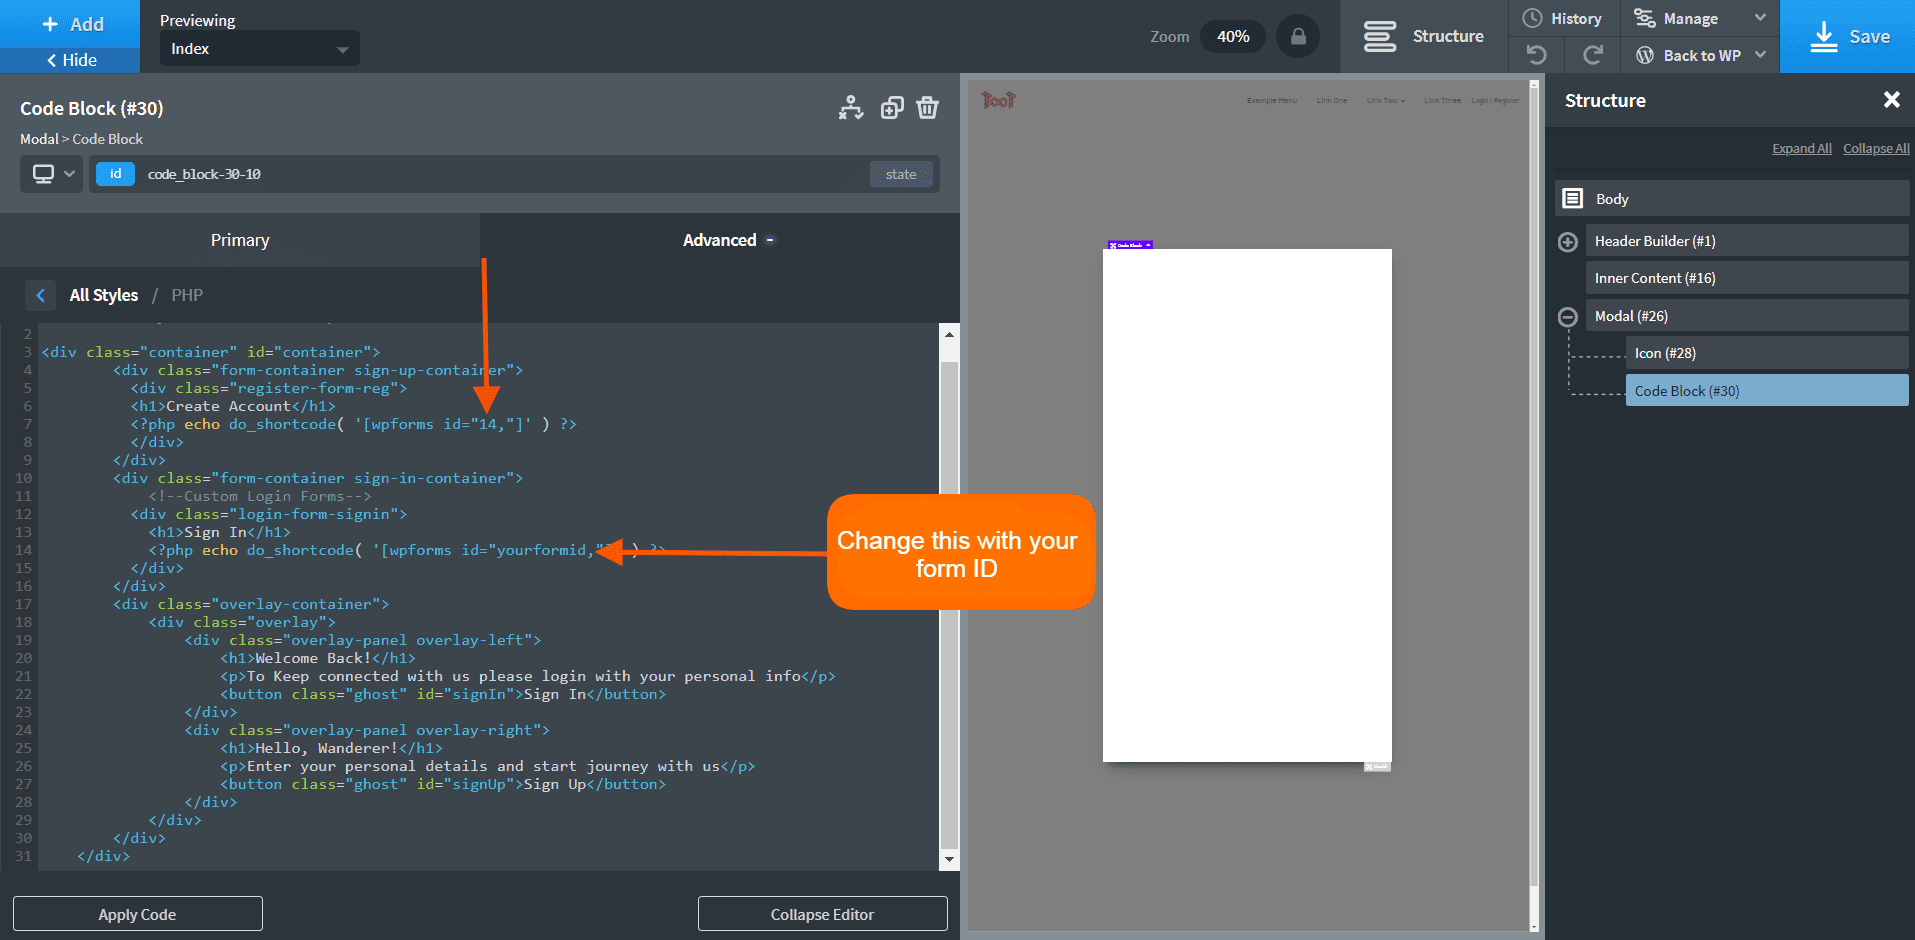
Now you should click on the Add button and add a Code Block to your Modal.
Now go to the PHP & HTML tab then add the following code to the code editor:
HTML
before going to CSS make sure to change the WPForms Form Id from the HTML code.
You can view your Form id by going to Dashboard > Wpforms > All Forms.
then go to the CSS tab and add the code below:
CSS
Now the only thing you should do is to add JavaScript, To add javascript go to the Primary tab and click on the JavaScript tab and paste the following code
JS
Now you can just click on the Save button to save it and preview it on the front-end.
You are done with the Creative Sliding Login / Register Form.
I look forward to hearing from you in the comments.
Hello everyone this is Khan Azimi From Tootweb.In today's post, I will show you how you can make a creative sliding login/register popup form on your WordPress websites with the Oxygen Builder. Preview: Here is the Login/Register Form video. Before starting this tutorial I want to mention that we will be using WPForms and the […]
First things first: We love comments and appreciate the time that our readers spend to share ideas and give feedback. Thank you to everyone who comments at the Content Marketing Institute.
However, we also want our comments to be as useful as possible to all of our readers. While we keep 99% of the comments, we will remove these:
Harassing comments: While conversation and the sharing of different ideas are encouraged, all comments need to be respectful towards our contributors and those leaving comments.
Anonymous comments: We only accept comments from people who identify themselves.
Promotional comments: If a comment is solely promotional in nature, we will remove it from the site.
We reserve the right to remove any comments from the site; please leave comments that are respectful and useful.
If you have any questions about the commenting policy, please let us know.


Terrific work! That is the type of info that are supposed to be shared across the internet.
Disgrace on the search engines for not positioning this
put up higher! Come on over and discuss with my site
. Thank you =)
There is definately a great deal to find out about this topic.
I love all the points you've made.